
Have you ever picked up a football, tried to throw it, and watched it wobble through the air like a flying pancake? Don’t worry, you’re not alone.
Throwing a football the right way looks smooth and effortless when quarterbacks do it, but behind that smooth spiral is a set of simple steps anyone can learn.
The secret is not just arm strength, it’s using your whole body to create power and control.
In this guide, we’ll walk you through how to throw a football that will help you throw straighter, farther, and with confidence.
By the end, you’ll know exactly what to do so your next pass doesn’t just reach your target, it impresses them too.
Equipment and Setup Before You Throw
Before you can learn the steps of throwing, you need the right setup. The proper football, shoes, and space make a huge difference in how well you perform.
- Choose the Right Ball: Use a youth-size football for smaller hands or a regulation ball for older players.
- Wear Proper Shoes: Athletic shoes with grip help you stay balanced and avoid slipping.
- Find Enough Space: Practice in an open field, park, or backyard with room to step forward.
- Warm Up First: Do arm circles, light stretches, and a quick jog to prepare your muscles.
With these basics ready, you’ll feel confident and focused as you start learning each throwing step.
Steps to Throw a Football Far
Step 1: Proper Grip on the Football

The way you hold the football sets the stage for your entire throw. Place your fingers on the laces, leaving space between your palm and the ball.
Your index finger should rest just above the seam, while your thumb supports underneath. This grip provides control, spin, and helps create the tight spiral that every quarterback aims for.
- Hold the ball lightly, don’t squeeze too tightly.
- Keep your pinky finger on or near the last lace for stability.
- Avoid gripping with your whole palm; let your fingers do the work.
Step 2: Stance and Balance
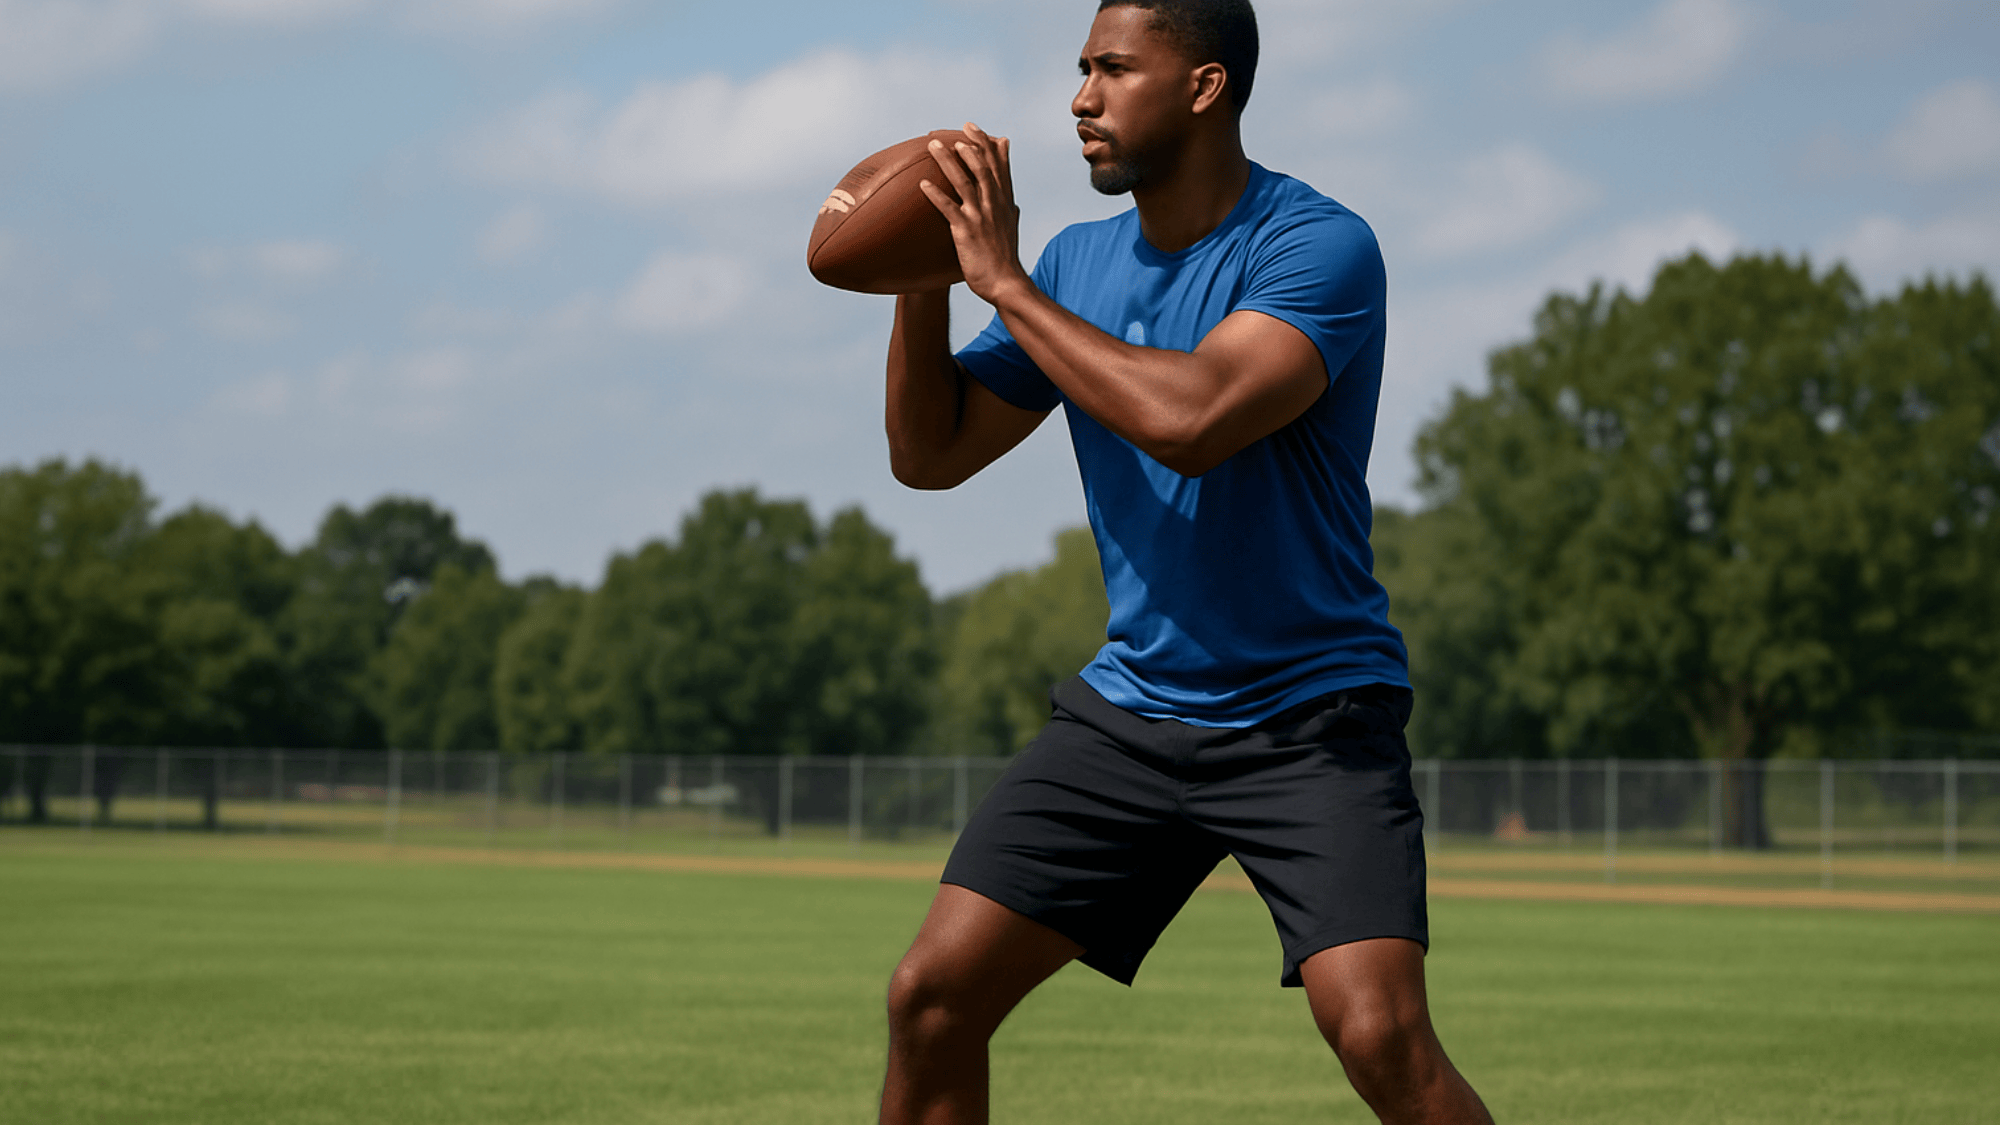
A strong throw starts with a solid stance. Stand with your feet shoulder-width apart and knees slightly bent, keeping most of your weight on your back leg.
Stay relaxed but athletic, ready to shift forward as you throw. This balanced position builds stability, making it easier to generate power and accuracy in your pass.
- Distribute about 60% of your weight on your back leg.
- Keep your toes pointed slightly toward the target.
- Stay light on your feet, ready to move smoothly into the throw.
Step 3: Wind-Up and Arm Position

As you wind up, bring the ball back with your throwing elbow at a 90-degree angle and at or above shoulder height.
Keep your forearm vertical and avoid dropping your arm too low, as it weakens power. Keep your chest slightly closed to the target; this builds tension and prepares your body for a strong, accurate release.
- Keep your non-throwing hand on the ball until you start your motion.
- Aim for a compact motion, and avoid swinging your arm too wide.
- Think of “pulling back an arrow” to create smooth, stored energy.
Step 4: Stride and Hip Rotation

Step forward with the foot opposite your throwing arm, planting it firmly toward your target. As you stride, rotate your hips first, then your shoulders; this separation creates power.
Keep your chest tall and controlled, letting the lower body drive the motion. A smooth stride and hip rotation generate distance, accuracy, and the force behind a strong throw.
- Step in line with your target, not too far left or right.
- Rotate your hips quickly, but keep your shoulders controlled.
- Think of “leading with the hips” to maximize throwing power.
Step 5: The Release and Follow-Through

As you release the ball, flick your wrist to create a tight spiral. Your arm should follow through naturally, finishing across your body at about waist level.
Keep your fingers pointing toward the target to guide accuracy. A full follow-through not only improves distance and control but also reduces strain on your shoulder and elbow.
- Release the ball at eye level for best accuracy.
- Snap your wrist down and inward to tighten the spiral.
- Let your arm finish low and across the body for a natural motion.
Momentum and Timing Techniques
Throwing isn’t just about strength; it’s about rhythm and timing. These simple techniques help add extra distance and smoothness to your throw:
| Technique | How It Helps |
|---|---|
| Crow Step | Step your back foot behind your front foot, then stride forward. This adds momentum and extra power to your throw. |
| Rocking Motion | Gently shift your weight backward, then forward, to load energy into your throw. |
| Smooth Sequence | Think of it like a chain: base ~> stride ~> hips ~> shoulders ~> release. Keeping this flow makes your throw smooth and powerful. |
With the right timing, each movement builds on the last, creating a throw that feels powerful and effortless.
Practice Drills to Improve Your Throw
The best way to get better at throwing is to practice the right way. These simple drills help build accuracy, distance, and confidence every time you step on the field:
- Wall Target Drill: Stand a few yards from a wall and aim at a small spot to improve accuracy.
- Step-Back Throws: Start close to a partner, then take a step back after each throw to build arm strength and control.
- Spiral Focus Drill: Throw shorter passes while focusing only on spinning the ball tightly.
- Core and Leg Exercises: Add squats, lunges, and planks to your routine to build the lower-body power needed for long throws.
With regular practice, these drills will make your throwing motion smoother, stronger, and much more consistent.
Common Mistakes and How to Fix Them
Even skilled players make small errors when throwing a football; fixing these common mistakes early will sharpen your technique, improve accuracy, and prevent injuries.
Throwing Only With Your Arm
Many beginners rely solely on arm strength, which limits their distance and can lead to injury.
Fix: Use your legs, hips, and core to drive the motion; your arm should guide, not power, the throw.
Dropping the Elbow Too Low
A low elbow creates weak, wobbly throws.
Fix: Keep your elbow at or above shoulder height and maintain a 90-degree angle during the wind-up.
Overstriding or Understriding
Stepping too far or too short hurts balance and accuracy.
Fix: Step naturally with the foot opposite your throwing arm, keeping it in line with your target.
By correcting these common errors early, you’ll see faster progress and throw with more confidence.
Final Thoughts
Throwing a football well takes more than a few tries; it takes steady practice and patience. Each step, from your grip to your follow-through, builds on the last.
At first, the motion may feel awkward, but the more you repeat it, the smoother it becomes. Don’t focus only on distance; focus on form and accuracy, and the distance will come naturally.
Even the best quarterbacks spend hours each week practicing these same basics.
If you stay consistent, you’ll not only throw farther and straighter but also gain real confidence every time you step onto the field.
Remember, every strong pass starts with solid technique, so grab a ball, keep practicing, and enjoy the progress you make.