
Looking for fun Christmas crafts to make with your kids this holiday season? You’re in the right place.
Getting children involved in holiday crafting creates memories that last long after decorations come down.
From simple paper projects to nature-based creations, these activities keep little hands busy and minds engaged.
This guide shares Christmas craft ideas perfect for kids of all ages. You’ll find projects using materials you already have at home. Each craft includes clear steps that make creating easy and stress-free.
Let’s start making holiday magic together.
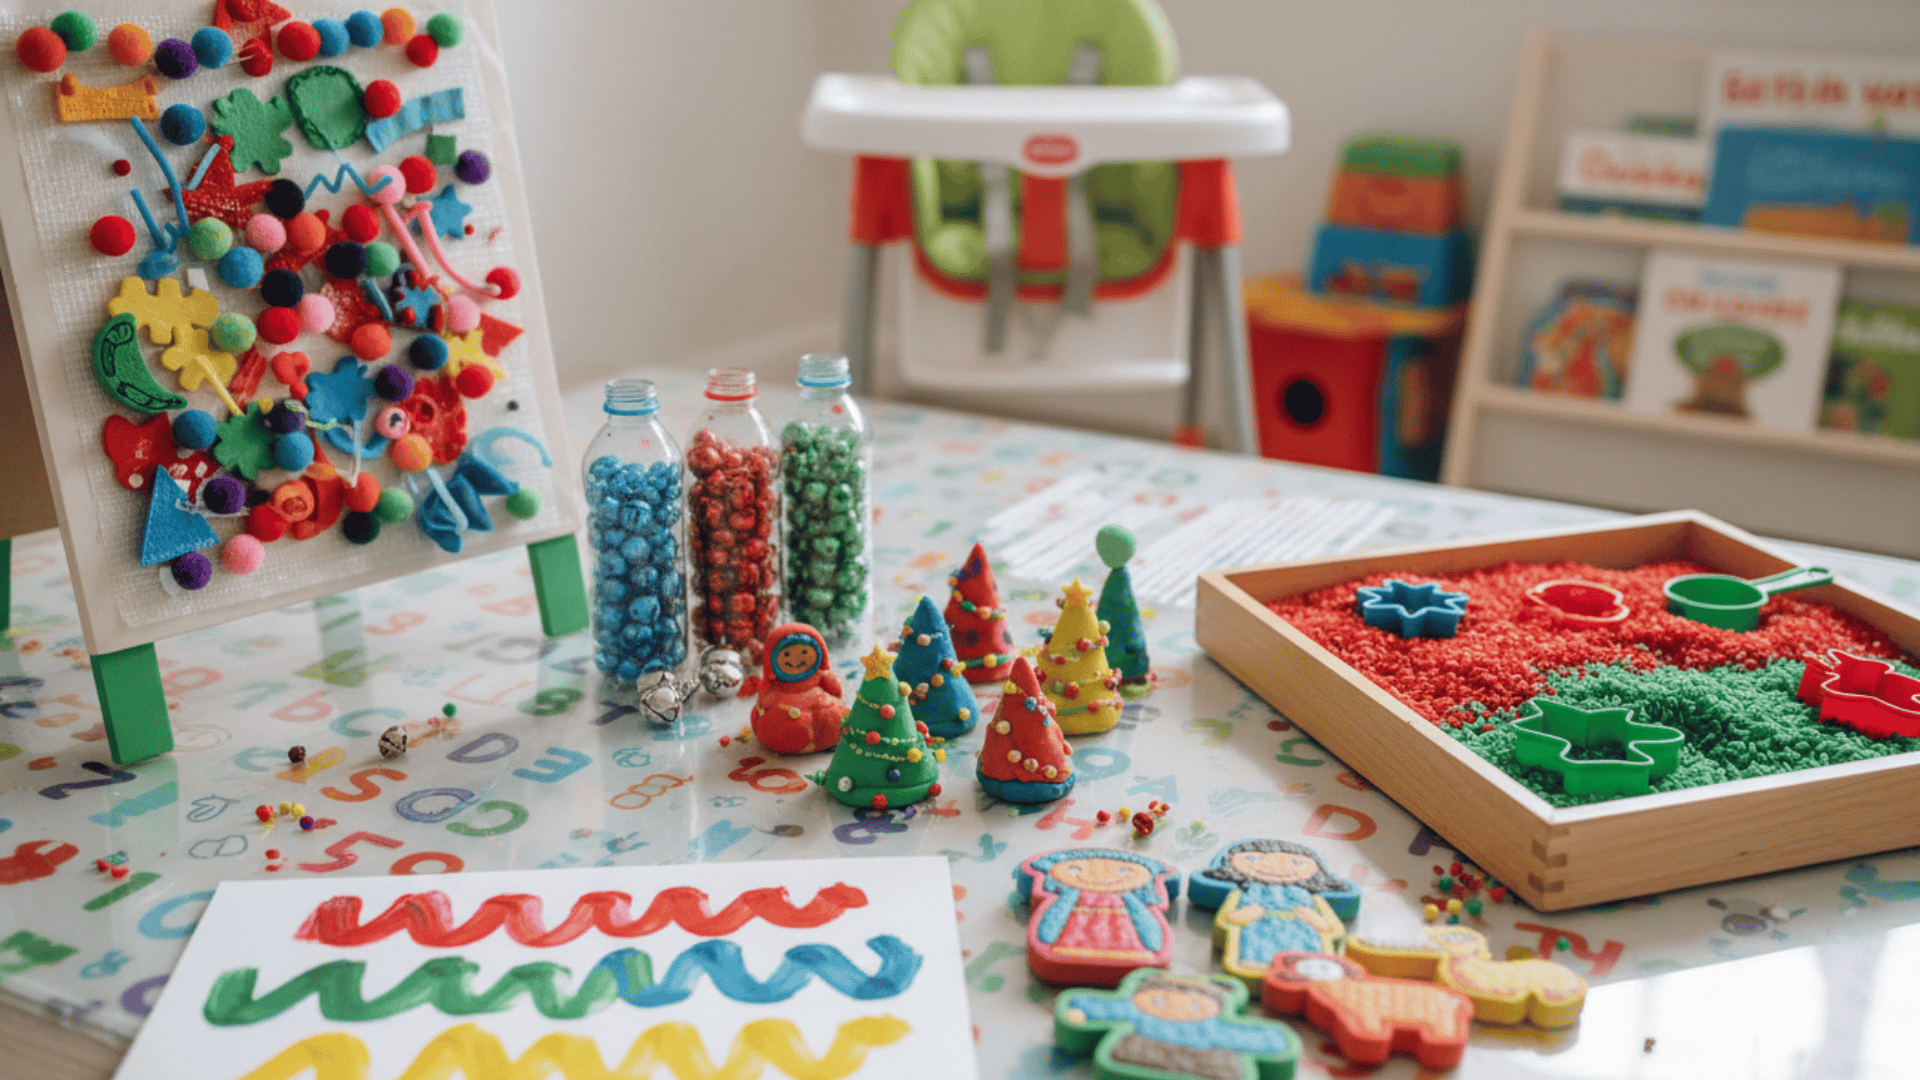
Essential Supplies for Christmas Arts and Crafts for Kids
Get your craft table ready with kid-friendly supplies that make holiday projects fun and stress-free.
These essentials help little hands create magical Christmas memories with ease.
| Item Type | Essentials |
|---|---|
| Cutting Tools | Safety scissors |
| Adhesives | Glue stick, school glue, tape |
| Papers | Construction paper, cardstock |
| Coloring Supplies | Crayons, markers, and washable paint |
| Decorative Items | Pom-poms, sequins, and googly eyes |
| Reusable Materials | Cardboard, toilet rolls, egg cartons |
| Nature Items | Pinecones, sticks, leaves |
| String Materials | Yarn, ribbon, twine |
| Moldable Materials | Playdough, air-dry clay |
| Cleanup Essentials | Apron, wipes, table cover |
Simple Paper Christmas Crafts for Kids
Paper crafts are simple, affordable, and perfect for beginners of all ages. These projects help kids build confidence while creating decorations they’ll be proud to display.
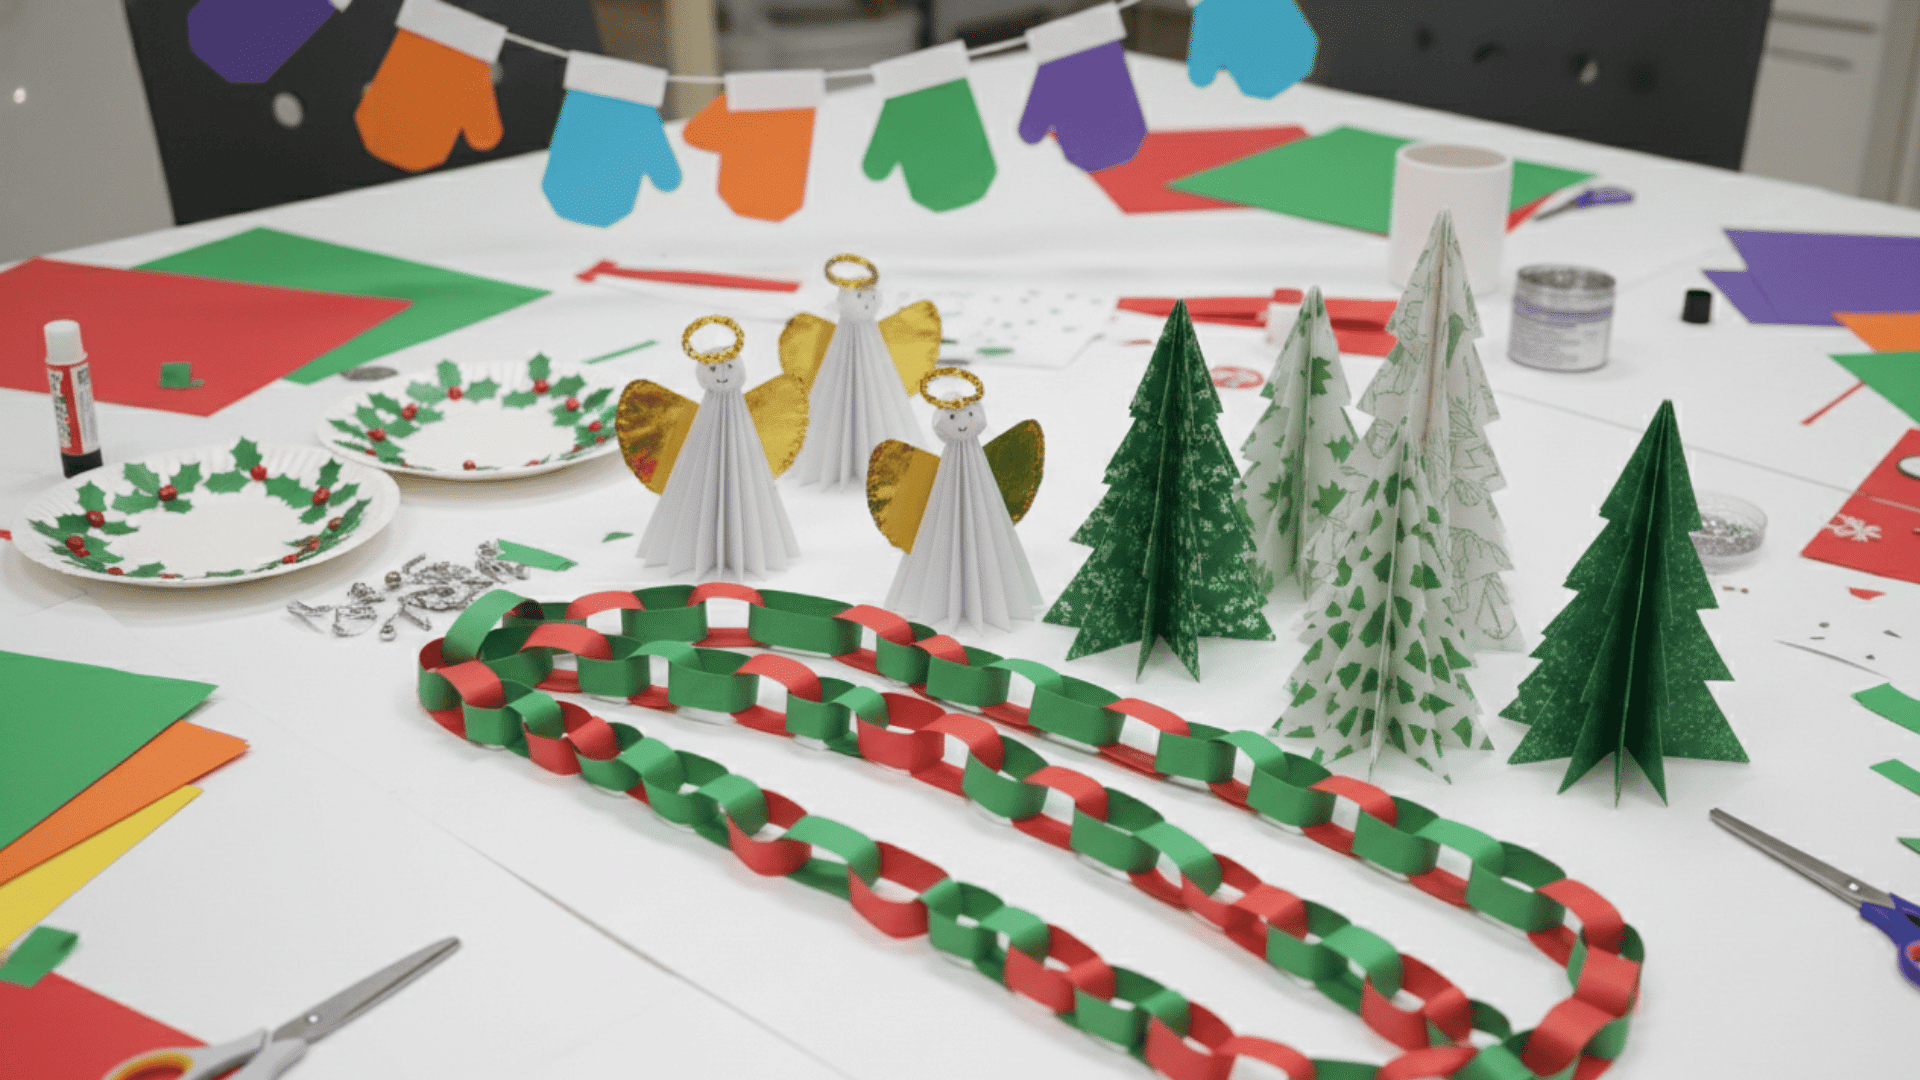
1. Paper Chain Christmas Countdown
Create a fun countdown that gets kids excited for Christmas morning. This simple craft teaches patience and builds anticipation.
Steps:
- Cut red and green paper into strips about 1 inch wide and 6 inches long.
- Loop one strip and secure with tape or glue, then thread the next strip through and connect.
- Number each link from 1 to 25, and hang the chain so kids can tear off one link each day.
2. Folded Paper Christmas Tree Forest
Build a tiny winter forest that fits perfectly on any shelf or table. Kids can make their trees look different with various colors and patterns.
Steps:
- Fold green cardstock in half lengthwise and cut out a simple tree shape while folded.
- Let kids decorate both sides with crayons, stickers, or small paper circles as ornaments.
- Open the fold slightly so the tree stands upright and arrange multiple trees together.
3. Santa Beard Mask
Turn kids into Santa with this playful mask that they can hold up to their face. It’s perfect for holiday photos and pretend play.
Steps:
- Cut a large oval from red or peach cardstock and add two eye holes near the top.
- Glue cotton balls or curled white paper strips across the bottom half for the beard.
- Tape a craft stick or wooden ruler to the bottom as a handle.
4. Tissue Paper “Stained Glass” Star
Bring color to your windows with this bright and cheerful star. When sunlight hits it, the colors glow like real stained glass.
Steps:
- Cut a star frame from black construction paper and stick it onto clear contact paper (sticky side up).
- Have kids place torn tissue paper pieces in different colors inside the star shape.
- Cover with another sheet of contact paper, trim the edges, then tape it to a window.
5. Accordion Paper Angels
These sweet angels are easy for small hands to fold and create. Kids love making a whole choir of angels to hang around the house.
Steps:
- Fold a rectangle of white paper back and forth like a fan to create an accordion.
- Pinch the middle with a pipe cleaner and twist to form wings on both sides.
- Draw a simple face on a small circle of paper, glue it on top, and add a halo made from a pipe cleaner loop.
6. Paper Plate Christmas Wreath
Use a paper plate to make a festive, fun wreath. This craft works well for all ages and uses supplies you already have.
Steps:
- Cut out the center circle of a paper plate, leaving only the outer ring.
- Glue green paper leaves, tissue paper pieces, or traced handprints all around the ring.
- Add a red paper bow at the bottom and punch a hole at the top for hanging with ribbon.
7. Peekaboo Window Christmas Card
Send a surprise card that reveals a hidden Christmas scene inside. Friends and family will smile when they open this special card.
Steps:
- Fold a piece of cardstock in half and cut a small window shape on the front panel.
- On the inside page, draw or glue a Christmas scene that shows through the window.
- Add stickers, borders, and a greeting message around the window frame.
8. Paper Strip Christmas Baubles (Flat for Walls)
Hang these colorful ornaments on walls or doors without worrying about breakage. They look three-dimensional but stay flat against surfaces.
Steps:
- Cut 5-7 strips of patterned or colored paper, all the same length but different widths.
- Glue both ends of each strip together at the top and bottom points, fanning them out to create a rounded ball shape.
- Add a paper circle on top as a cap and draw a string line so it looks ready to hang.
9. Cozy Mitten Paper Garland
String together colorful mittens to decorate doorways or mantels. Each mitten can have its own design and personality.
Steps:
- Trace a mitten template onto colored paper and cut out several pairs.
- Let kids decorate each mitten with drawn patterns, cotton trim, or glitter glue details.
- Punch a hole in each mitten top and thread them onto a length of yarn, spacing them evenly along the string.
Ornament Crafts for the Christmas Tree
Paper crafts are budget-friendly and let kids practice cutting, folding, and gluing. Now let’s move into ornaments that they can hang on the tree.
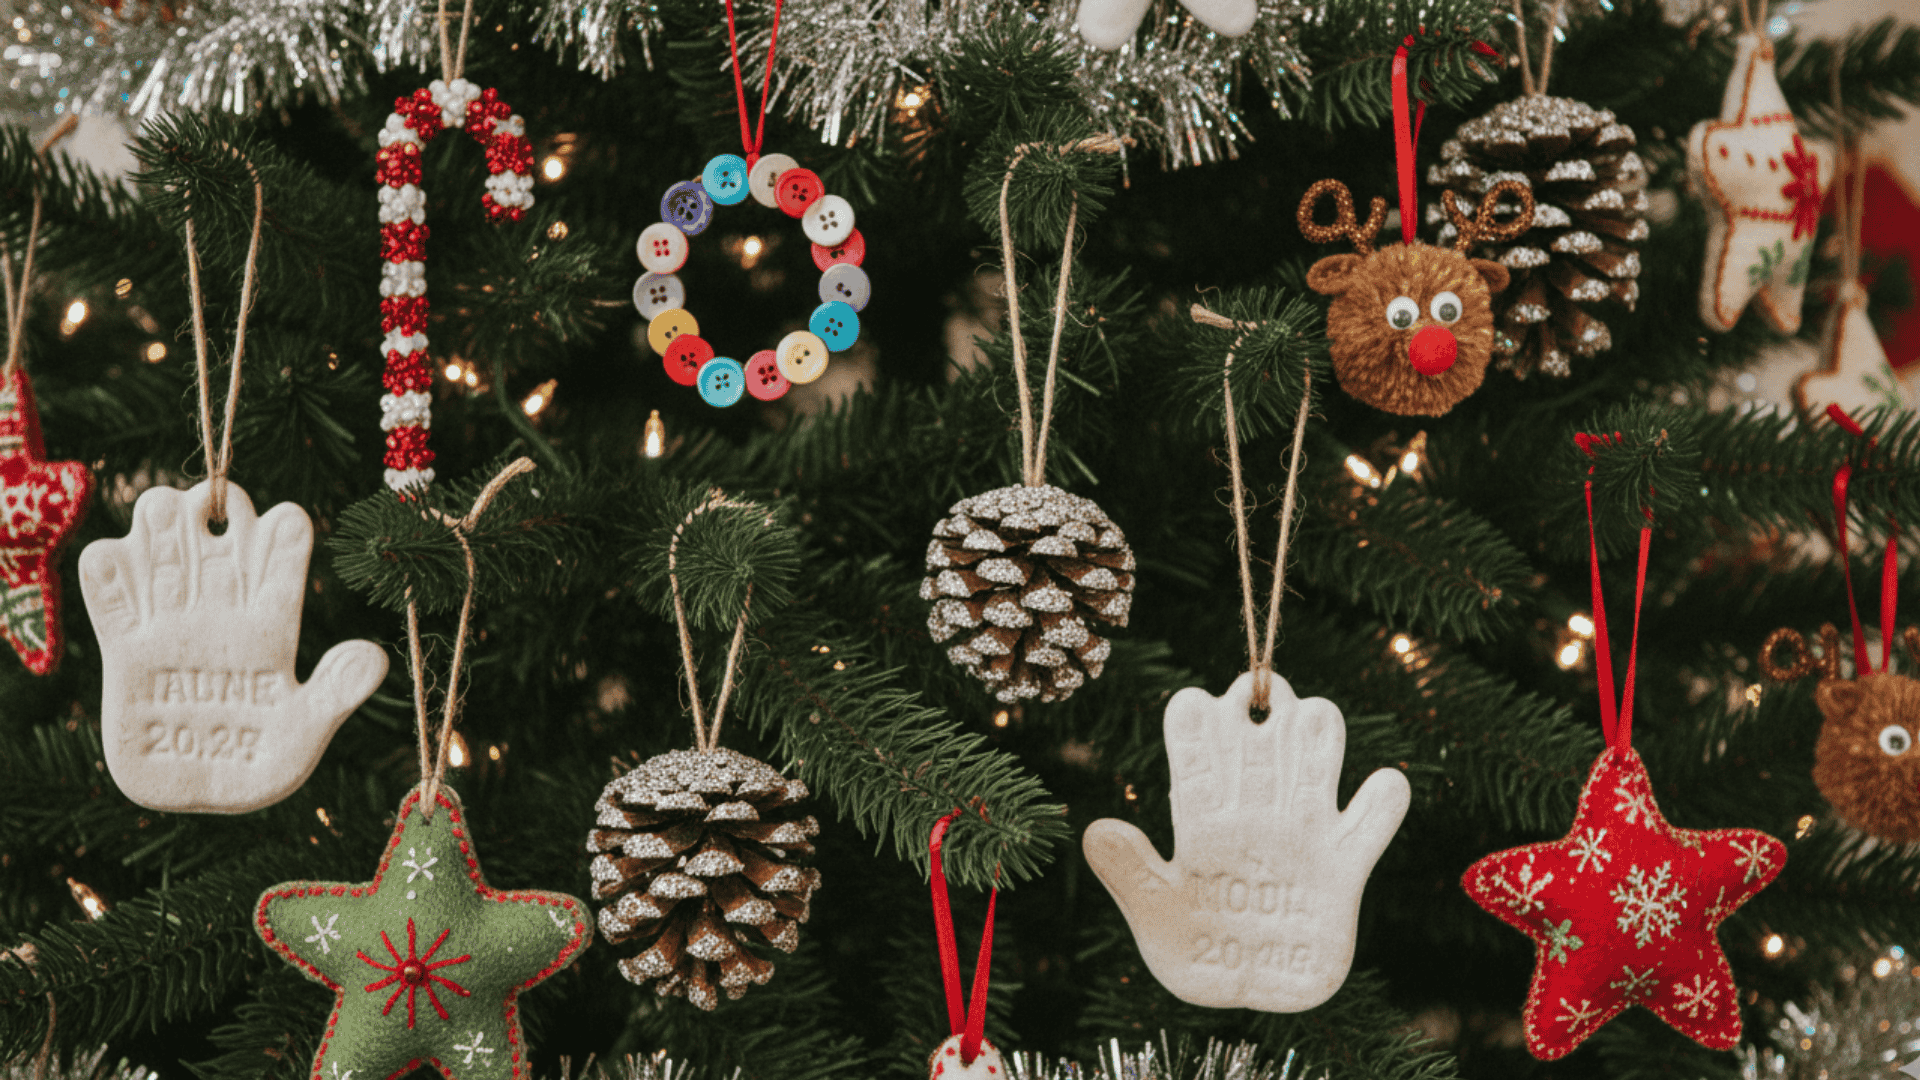
10. Salt Dough Handprint Ornament
Capture your child’s tiny handprint to treasure for years to come. These ornaments become precious keepsakes that families love to display.
Steps:
- Mix 2 cups of flour, 1 cup of salt, and 1 cup of water into a dough, roll it flat, and press it into a handprint.
- Cut around the handprint in a circle or heart shape, poke a hole at the top, and bake at 200°F for 2-3 hours.
- Once cool, let kids paint and add their name, then seal with clear varnish or glue.
11. Cinnamon Stick Tree Ornament
These smell wonderful and look rustic on any Christmas tree. The cinnamon scent adds a natural holiday fragrance to your home.
Steps:
- Cut small triangles from green felt in decreasing sizes to look like tree branches.
- Glue the triangles to a cinnamon stick, starting with the largest at the bottom.
- Add tiny pom-poms or buttons as decorations and tie ribbon at the top for hanging.
12. Beaded Candy Cane Ornament
Kids can practice their fine motor skills while threading beads into a festive pattern. These candy canes never melt and last year after year.
Steps:
- Give kids a white pipe cleaner and a pile of red and white pony beads.
- Thread beads in an alternating red and white pattern until the pipe cleaner is nearly full.
- Bend the top third into a candy cane hook shape and twist the ends together tightly.
13. Button Wreath Ornament
This mini wreath uses buttons you probably have in your craft drawer. It’s quick to make and adds a homemade charm to your tree.
Steps:
- Shape a green pipe cleaner into a small circle and twist the ends together.
- Slide green buttons of different sizes onto the circle until it’s completely covered.
- Add a small red ribbon bow at the bottom and form a loop at the top for hanging.
14. Pom-Pom Reindeer Ornament
Soft, fuzzy reindeer bring texture and fun to your Christmas tree. Kids love making these cute characters with silly expressions.
Steps:
- Glue one medium brown pom-pom to a larger brown pom-pom for the head and body.
- Add googly eyes, a small red pom-pom for the nose, and twist pipe cleaner pieces into antlers.
- Tie a loop of thread or thin ribbon around the body and hang from a tree branch.
15. Felt Star Pillow Ornament
This soft ornament feels nice to touch and won’t break if it falls. The pillow design makes it extra special and huggable.
Steps:
- Cut two identical star shapes from felt in any color you like.
- Let kids decorate the front piece with sequins, simple stitches, or fabric markers.
- Glue or sew around the edges, leaving a small opening to stuff with fiberfill, then close and add a ribbon loop.
16. Mini Photo Frame Ornament
Display a favorite photo right on the Christmas tree each year. These frames make thoughtful gifts for grandparents and relatives.
Steps:
- Cut a small square frame from cardboard and paint it or wrap it with decorative paper.
- Glue a photo to the back of the frame opening, and trim any excess.
- Add ribbon at the top for hanging and decorate the frame edges with markers or small stickers.
17. Glittered Pinecone Ornament
Nature meets sparkle in this simple but pretty ornament. The glitter catches the tree lights, creating a magical glow.
Steps:
- Brush watered-down white glue onto just the tips of a pinecone.
- Sprinkle glitter onto a tray or paper plate, then roll the pinecone tips in it.
- Let dry completely, then tie a ribbon or twine loop around the top layers for hanging.
18. Scrabble Tile Initial Ornament
Spell out names or initials using letter tiles from old board games. This personalized touch makes each ornament unique to its owner.
Steps:
- Glue letter tiles spelling a name or initial onto a strip of cardstock or felt.
- Trim the background into a shape and decorate with markers, paint, or ribbon.
- Punch a hole at the top, thread through a string or ribbon, and hang it on the tree.
Recycled & Upcycled Kids Christmas Crafts
Handmade ornaments bring warmth and memories to your tree each year. Next, let’s explore crafts made from items you’d usually throw away.
19. Toilet Roll Reindeer Family
Save those empty toilet rolls and turn them into adorable reindeer. This craft proves that trash can become something really cute.
Steps:
- Paint toilet paper rolls brown and let them dry completely.
- Draw or glue on faces with markers, add googly eyes, and cut antlers from brown cardstock.
- Glue on small paper ears and display the whole reindeer family on a shelf.
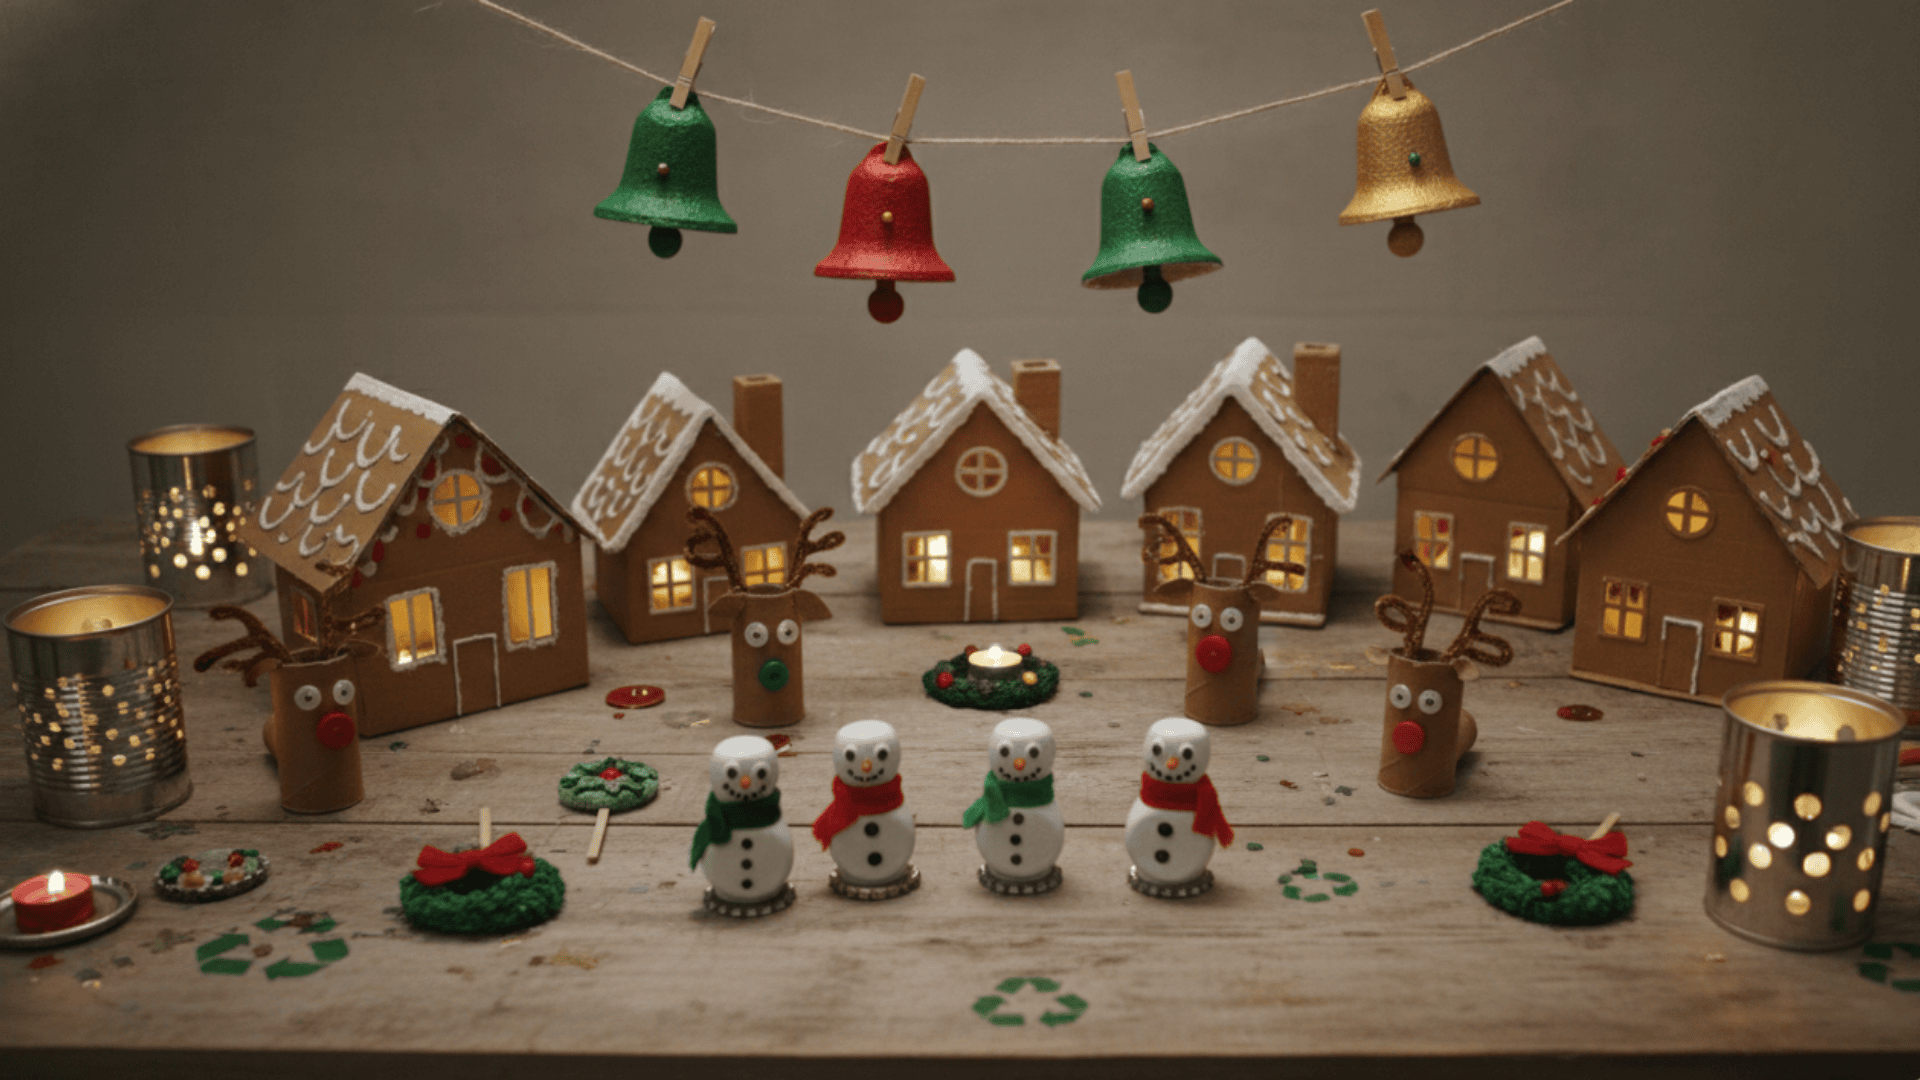
20. Egg Carton Bell Garland
Those cardboard egg cartons find new life as colorful bells. String them together for a garland that looks festive and fun.
Steps:
- Cut individual cups from an egg carton and paint them red, green, gold, or silver.
- Poke a small hole in the top of each cup and thread yarn through, tying knots to hold them in place.
- Add small jingle bells or beads inside the cups to make them jingle when they move.
21. Cardboard Gingerbread House Village
Build a whole village from old cardboard boxes. These houses look sweet and smell even better if you add cinnamon to the paint.
Steps:
- Cut simple house shapes with roofs from flattened cardboard boxes.
- Paint them brown and use white paint pens to draw icing details like doors, windows, and trim.
- Stand houses upright and arrange them together on a tray with cotton or fake snow around them.
22. Magazine Strip Christmas Tree Collage
Old magazines provide colorful strips for creating layered tree art. This craft teaches kids about collage and creative reuse.
Steps:
- Cut or tear magazine pages into strips of different lengths and shades of green.
- Glue strips onto paper in layers, starting with the longest at the bottom to form a tree shape.
- Cut a bright yellow star from a magazine page and glue it at the very top.
23. Bottle Cap Snowman Magnets
Metal bottle caps from soda or juice bottles become tiny snowman magnets. Stick them on the fridge to hold holiday cards and photos.
Steps:
- Glue three bottle caps in a vertical line on a piece of cardboard backing.
- Paint the caps white and draw snowman features like eyes, buttons, and a carrot nose inside each cap.
- Attach a strip of magnetic tape or small magnets to the back of the cardboard.
24. Jar Lid Mini Wreaths
Those lids from pasta sauce or jam jars make perfect wreath bases. Wrap them up and hang them anywhere you need a touch of green.
Steps:
- Wrap green yarn or thin ribbon around metal jar lids until the metal is completely covered.
- Glue small buttons, sequins, or beads onto the wreath as decorations.
- Add a tiny bow at the bottom and a ribbon loop at the top for hanging.
25. Cereal Box Gift Tags
The plain cardboard side of cereal boxes is perfect for making gift tags. This saves money and gives boxes a second purpose.
Steps:
- Cut tag shapes from the plain side of cereal boxes using scissors or a hole punch.
- Let kids decorate tags with stamps, drawings, stickers, or collaged magazine pieces.
- Punch a hole at the top and thread twine or ribbon through for tying onto presents.
26. Tin Can Luminaries (With Supervision)
Empty tin cans become beautiful light holders with a little effort. The patterns glow when you place a candle or light inside.
Steps:
- Fill clean cans with water and freeze solid to keep the metal from denting when punched.
- With adult help, use a hammer and nail to punch holes in patterns like stars or snowflakes around the can.
- Empty the ice, dry the can thoroughly, and place a battery-operated tea light inside for safe, glowing illumination.
27. Old Sock Snowman
A lonely sock without its match becomes a plump little snowman. This craft is soft, squishy, and fun to make.
Steps:
- Fill a white sock with uncooked rice and tie rubber bands or string to create sections for the body and head.
- Glue on buttons, wrap a strip of fabric as a scarf, and add pins or felt pieces for facial features.
- Cut off the cuff of a colorful sock, fold it into a hat, and secure it on the head.
Nature-Based Christmas Arts and Crafts for Kids
Recycling materials for crafts teaches kids to see potential in everyday items. Now let’s bring natural materials into the holiday mix.
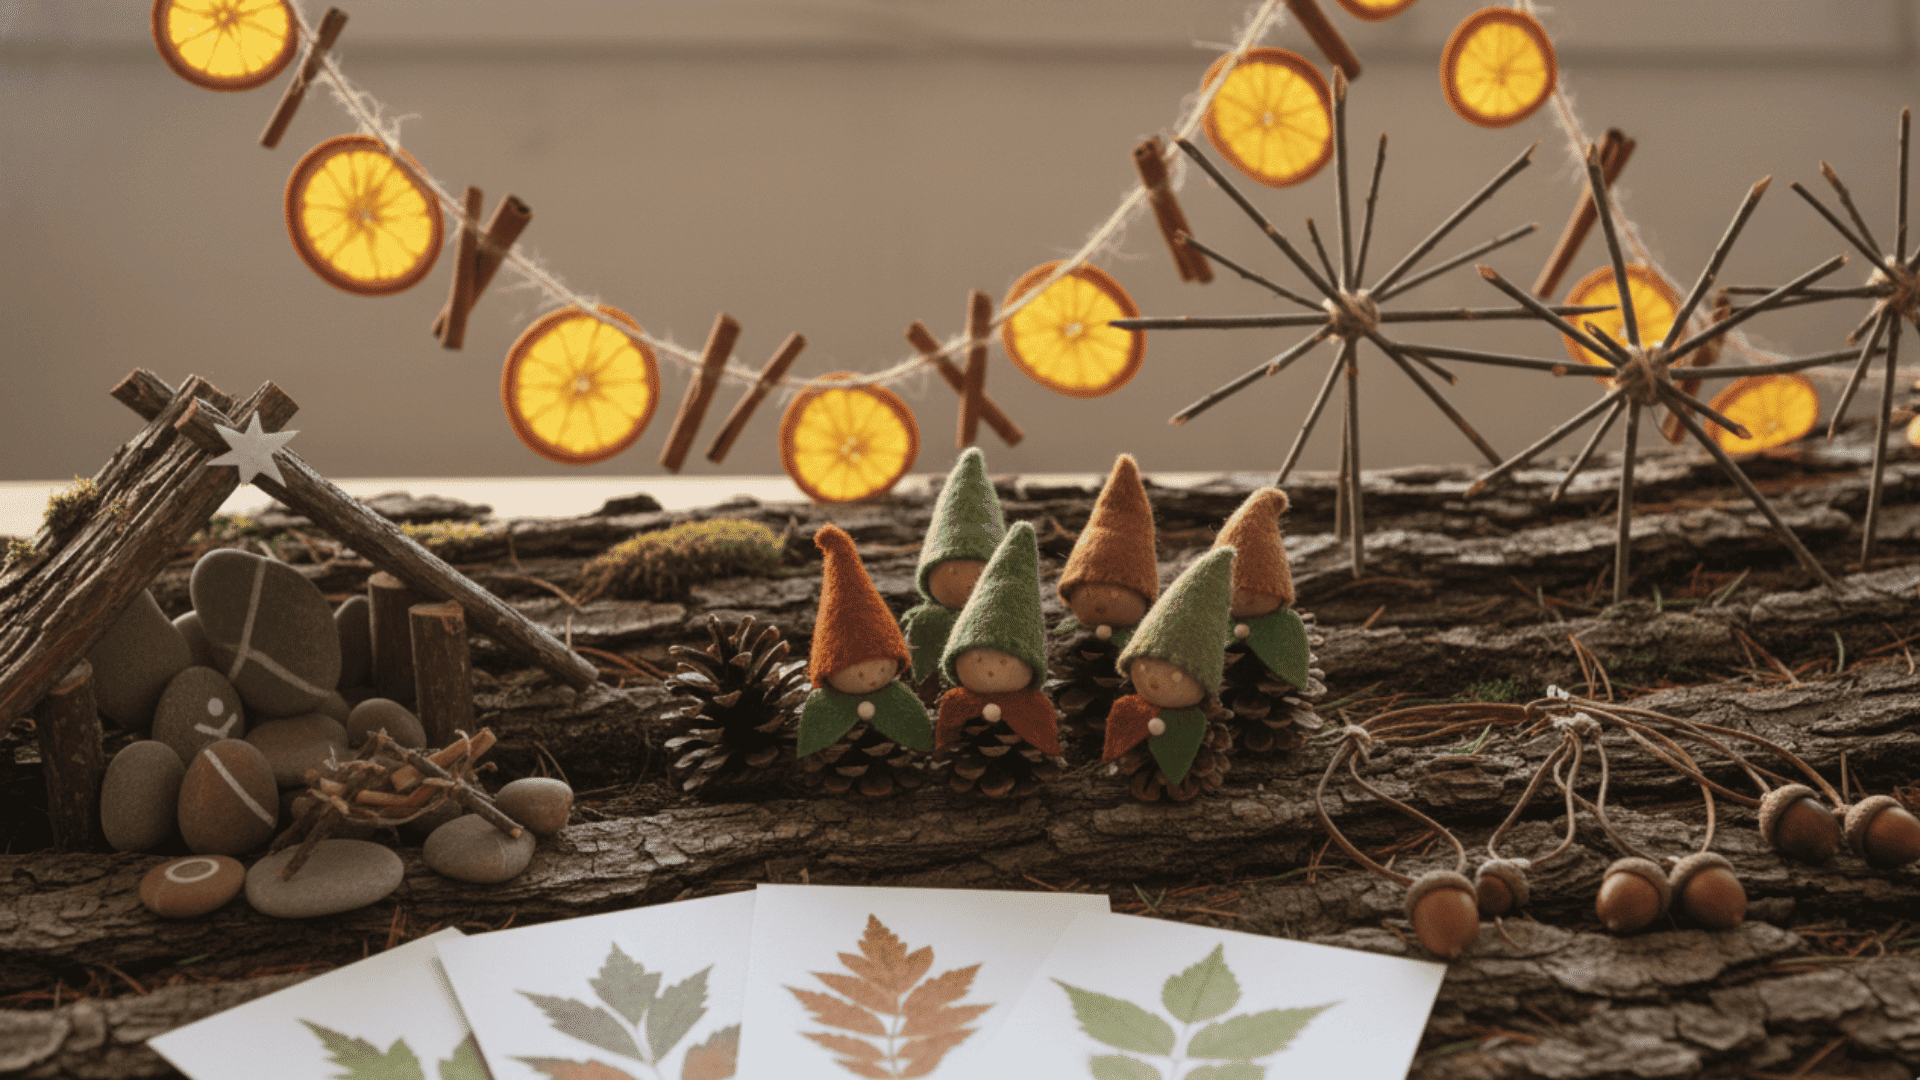
28. Pinecone Christmas Elves
Turn pinecones into a group of tiny elves with pointy hats. These woodland characters bring nature indoors for the holidays.
Steps:
- Glue a small wooden bead on top of each pinecone to serve as the elf’s head.
- Cut and glue scraps into small felt hats, scarves, and mittens.
- Draw simple faces with markers and stand the elves in a row on a windowsill or shelf.
29. Dried Orange Slice Garland
Dried orange slices smell wonderful and look beautiful strung together. This natural garland brings a cozy, festive scent to any room.
Steps:
- Slice the oranges thinly and bake them at a low heat (about 200°F) for several hours, until completely dry.
- Let kids thread the dried slices onto twine, adding bay leaves or cinnamon sticks in between for variety.
- Hang the garland across a window, along a mantel, or around a doorway.
30. Rustic Stick Star Wall Hanging
Collect sticks on a nature walk and turn them into a simple star. This craft connects kids with the outdoors even in winter.
Steps:
- Find or cut five straight sticks to equal lengths, about 6-8 inches long.
- Lay them in a star pattern and tie each intersection with string or twine.
- Wrap the star with thin ribbon or battery-operated fairy lights and hang it on the wall.
31. Leaf Print Christmas Cards
Fresh or pressed leaves create beautiful natural prints on card fronts. Each print comes out slightly different and unique.
Steps:
- Paint the bumpy underside of a leaf with washable paint in holiday colors.
- Press the painted leaf firmly onto the front of a folded card, then lift carefully.
- Add small details with markers to turn the print into a tree, wreath, or angel wing design.
32. Pebble Nativity Scene
Smooth stones from a garden or stream become figures in a nativity display. The simple shapes let imagination fill in the details.
Steps:
- Collect smooth pebbles in different sizes and wash them clean.
- Arrange and glue them on cardstock as simple figures inside a stable outline drawn with a marker.
- Add tiny details like halos, stars, or straw using paint pens or markers.
33. Acorn Cap Jingle Necklaces
Acorn caps are perfect little holders for tiny bells. These necklaces jingle softly as kids move and dance.
Steps:
- Glue a loop of twine or thread to the inside top of each acorn cap.
- Place a small jingle bell or bead inside each cap, then secure it with a dot of glue.
- Tie several caps together to make a necklace or bracelet.
34. Snowy Pinecone Trees
Stand pinecones upright to look like miniature Christmas trees. A touch of white paint makes them look covered in fresh snow.
Steps:
- Glue each pinecone upright onto a small cardboard circle to keep it stable.
- Dab white paint on the tips of each layer to create a snowy effect.
- Add tiny sequins or beads as lights and decorations using dots of glue.
35. Twig Reindeer Ornaments
Three small twigs come together to form a reindeer face. These lightweight ornaments are perfect for hanging on any tree branch.
Steps:
- Glue three small twigs into a triangle shape for the reindeer’s face outline.
- Glue one more twig across the top as antlers, then add googly eyes and a red pom-pom nose.
- Tie a loop of string at the top and hang the reindeer on your tree.
36. Nature Collage Winter Scene
Take a walk outside and collect small natural items to create art. This craft turns nature treasures into a winter picture.
Steps:
- Gather small leaves, seeds, twigs, bark pieces, and pebbles during an outdoor walk.
- Glue items onto blue or gray cardstock to build a winter landscape with trees, ground, and sky.
- Add snowy highlights using white paint, chalk, or crayon dots and swirls.
Sensory & Toddler-Friendly Christmas Crafts
Nature-based crafts connect kids to the world outside and teach them about natural materials. Let’s shift to sensory activities perfect for younger children.
37. Scented Christmas Playdough Trees
Homemade playdough smells like Christmas and feels soft in little hands. Kids can build and rebuild trees as many times as they want.
Steps:
- Make playdough using flour, salt, water, and oil, then add cinnamon or peppermint extract for scent.
- Provide tree-shaped cookie cutters and small items like beads, buttons, and sequins.
- Let kids press decorations into their playdough trees and reshape them repeatedly.
38. Sticky Wall Ornament Collage
Contact paper creates a giant sticky canvas on the wall. Toddlers love sticking pieces on and watching their creation grow.
Steps:
- Tape a large piece of clear contact paper to the wall at child height, sticky side facing out.
- Give kids tissue paper pieces, yarn lengths, foil scraps, and cut-out ornament shapes.
- Let them press pieces onto the sticky surface to build colorful ornaments and Christmas designs.
39. Jingle Bell Shaker Bottles
Clear bottles filled with bells and glitter become musical instruments. Kids can shake along to holiday songs while watching the sparkle inside.
Steps:
- Fill empty, clear plastic bottles with jingle bells, colorful beads, and a spoonful of glitter.
- Add a small amount of water or colored rice if you want more movement inside.
- Seal the lid tightly with strong tape or glue and let kids shake them to make music.
40. Christmas Sensory Rice Tray
Colored rice feels interesting to touch and pour. This activity keeps toddlers busy while they explore textures and colors.
Steps:
- Dye uncooked rice red and green using food coloring and vinegar, then let it dry on trays.
- Pour the colored rice into a shallow container and add small scoops, cups, and plastic figures.
- Encourage kids to pour, bury, dig, and move the rice around with their hands and tools.
41. Foam Shape Nativity Scene
Soft foam shapes are easy for small hands to hold and move. Kids can build and rebuild the nativity story over and over.
Steps:
- Cut simple figures from foam sheets: people, animals, a stable, and a star.
- Give kids a large piece of foam board or felt as a background.
- Let them arrange and stick foam pieces to create their own nativity scene.
42. Giant Floor Paper Tree Decorating
Tape paper to the floor and let kids decorate while sitting or lying down. This large-scale craft feels special and different from table work.
Steps:
- Tape a big sheet of butcher or craft paper flat on the floor and draw a large tree outline.
- Provide stickers, paper shapes, crayons, and washable markers for decorating.
- Let kids sit, crawl, or walk around the paper as they fill the tree with colors and designs.
43. Finger-Painted Christmas Lights String
Fingerprints become bright bulbs on a string of lights. This simple painting activity creates a cheerful piece of art.
Steps:
- Draw a wavy line with loops across a piece of cardstock to represent a light string.
- Show kids how to dip fingertips in paint and press along the line to make colorful bulb prints.
- Once dry, use a marker to add small rectangles above each print as bulb caps.
44. Fuzzy Sticker Stockings
Soft, textured stickers feel good to the touch and stick well. Toddlers practice fine motor skills as they decorate their own stockings.
Steps:
- Cut large stocking shapes from sturdy cardstock or construction paper.
- Provide felt stickers, fuzzy pom-poms, and soft fabric scraps for decorating.
- Let toddlers press and stick pieces anywhere they like on their stocking.
45. Snow Slime with Glitter Stars
White, stretchy slime feels cool and fun to play with. The glitter and stars make it look like snowy magic.
Steps:
- Make white slime using school glue mixed with baking soda and contact lens solution or liquid starch.
- Mix in silver glitter and plastic star confetti while stretching the slime.
- Let kids stretch, squish, and swirl their snowy slime on a tray or mat.
Classroom & Group Kids Christmas Crafts

Sensory activities help young children explore while building important skills. Now let’s look at crafts that work well in classroom settings.
46. Thumbprint Reindeer Classroom Wreath
Every student adds their own reindeer to create one big class wreath. This group project shows teamwork and individual contributions.
Steps:
- Cut a large ring from green poster board to serve as the wreath base.
- Have each child press their thumb in brown paint and stamp it on the wreath, then add antlers, eyes, and a nose.
- Let kids sign their names near their reindeer, add a big bow, and hang the wreath on the classroom door.
47. Paper Quilt Christmas Tree Mural
Each student decorates one square that becomes part of a larger tree. The different patterns create a patchwork effect that looks beautiful.
Steps:
- Draw a large Christmas tree outline on bulletin board paper, then divide it into equal squares.
- Give each child one square to decorate with patterns, colors, and designs of their choice.
- Glue all decorated squares inside the tree outline like a quilt and display on a wall.
48. Desk Buddy Mini Stockings
Personal stockings hanging on each desk make the classroom feel festive. Kids can fill them with notes or small treats for each other.
Steps:
- Provide simple felt or sturdy paper stocking templates for each student.
- Let kids decorate their stockings with their names, drawings, stickers, and markers.
- Clip or tape each finished stocking to the edge of the student’s desk.
49. Cardboard Tube Caroler Choir
Empty paper towel tubes become a singing choir display. Line them up and you’ll almost hear them singing holiday songs.
Steps:
- Wrap cardboard tubes with colored paper as clothing and draw faces on paper circles for heads.
- Fold tiny rectangles of paper in half as songbooks and glue them into the “hands.”
- Arrange all carolers in a row on a shelf or table to look like a choir performance.
50. Sticker-Only Ornament Station
Set up a station where kids only use stickers to decorate. This no-mess activity works great when time or supplies are limited.
Steps:
- Cut large ornament shapes from thick cardstock in various colors.
- Set out containers filled with different stickers: stars, dots, snowflakes, and alphabet letters.
- Let kids cover their ornaments with stickers and use letter stickers to add their names.
51. Paper Strip Kindness Chain
Build a chain that grows longer with each kind act. This craft combines creativity, character building, and community spirit.
Steps:
- Cut colorful strips of paper and give a few to each student throughout December.
- Have kids write one kind action they did or will do on each strip.
- Connect strips into a growing paper chain and drape it around the classroom as it gets longer.
52. Classroom Advent Acts Calendar
Count down to winter break by doing kind actions together. This calendar provides the class with a shared goal and a positive focus each day.
Steps:
- Draw 24 numbered boxes on a large poster board.
- As a class, think of simple kind acts like helping someone, sharing, or saying thank you, and write one in each box.
- Open one box each day in December and complete the kind action together.
53. Folded Paper Star Mobiles
Hanging stars add dimension and movement to the classroom ceiling. Students feel proud seeing their work displayed above them.
Steps:
- Teach kids to fold simple paper stars, or provide pre-cut star shapes for decoration.
- Let each child decorate several stars with patterns, glitter, or markers.
- Hang stars from coat hangers or sticks with fishing line or thread to create mobiles.
54. Shared Wrapping Paper Design Roll
Students work together on one long sheet that becomes gift wrap. This collaboration teaches kids about shared projects and creative cooperation.
Steps:
- Roll out a long sheet of plain kraft paper across several tables.
- Provide stamps, paint, sponges, and crayons for everyone to use.
- Let each child decorate a section of the roll, then use it to wrap class gifts or send it home with students.
DIY Christmas Decorations Kids Can Make
Group activities build community and give everyone a chance to contribute. Next, let’s create decorations kids can display around their homes.
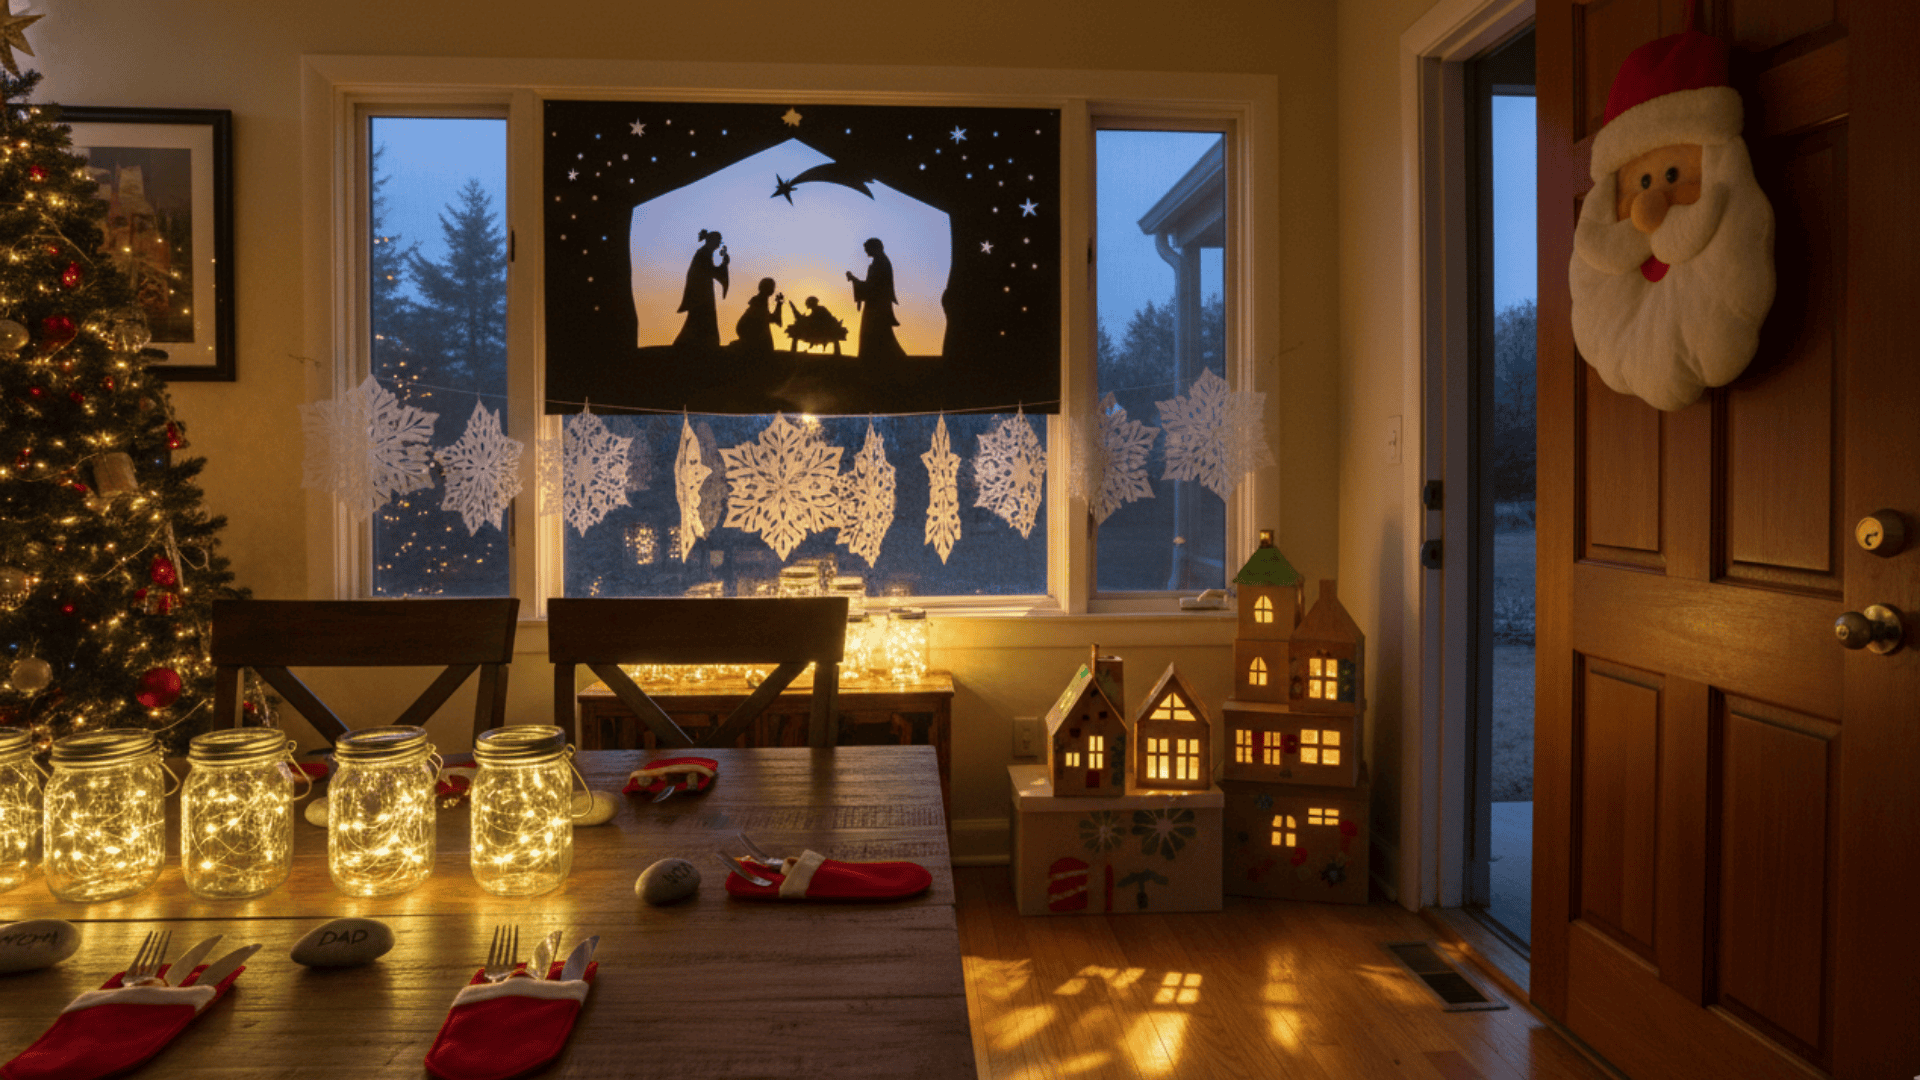
55. Window Silhouette Nativity Scene
Black paper shapes on a window tell the Christmas story in shadows. This simple display looks striking and requires very few materials.
Steps:
- Cut simple silhouettes from black construction paper: Mary, Joseph, baby, animals, stable, and wise men.
- Arrange the figures on a clean window and secure them with small pieces of tape.
- Cut and tape a large yellow paper star above the stable to complete the scene.
56. Paper Snowflake Curtain
Individual snowflakes, strung together, create a falling-snow effect. Hang this curtain in a doorway and walk through a winter wonderland.
Steps:
- Fold white paper squares and cut out different snowflake patterns, making as many as you want.
- Tape or tie snowflakes along several lengths of string, spacing them a few inches apart.
- Hang strings across a doorway or window frame so snowflakes dangle at different heights.
57. Christmas Table Name Card Pebbles
Smooth stones become personalized place cards for holiday meals. Guests feel special when they see their names waiting at the table.
Steps:
- Collect smooth, flat pebbles from outside and wash them thoroughly.
- Paint them white or leave them natural, then write names with paint pens or permanent markers.
- Add tiny holly leaves, dots, or star designs around each name and place at table settings.
58. Door Hanging Santa Face
Greet visitors with Santa’s jolly face hanging on the door. This large decoration is easy to spot and makes everyone smile.
Steps:
- Cut a big circle from peach or tan cardstock for the face and a red triangle for the hat.
- Glue cotton balls along the hat brim and across the bottom half as Santa’s fluffy beard.
- Draw eyes, a nose, and a smile, then attach a string or ribbon at the top for hanging.
59. Mason Jar Tissue Lanterns
Glass jars covered in tissue paper glow softly when lit from inside. These lanterns create a warm, cozy feeling on dark winter evenings.
Steps:
- Tear tissue paper in holiday colors into small pieces about 1 inch across.
- Brush watered-down glue onto a clean jar, and press tissue pieces onto it in overlapping layers.
- Let dry completely, then place a battery-operated tea light inside for safe, glowing illumination.
60. Felt Cutlery Pockets
Wrap silverware in these festive felt holders for a special holiday table. They make setting the table feel more fun and fancy.
Steps:
- Cut rectangles from felt and fold up the bottom third to create a pocket.
- Glue or stitch the sides closed and trim the top edge with pinking shears for decoration.
- Add simple felt shapes like trees or stars to the front and slide forks, knives, and spoons inside.
61. Shoebox Christmas Village Scene
A shoebox on its side becomes a tiny village display. Kids can peek inside and see the little world they created.
Steps:
- Stand a shoebox on its side so the opening faces forward like a stage.
- Add paper houses, cardboard trees, and small figures inside, gluing them to the bottom.
- Sprinkle cotton batting or torn paper around as snow and add a drawn or painted sky background.
62. Stamped Holiday Pillowcases
Turn plain pillowcases into festive bedding with simple stamps. Kids will love sleeping on pillows they decorated themselves.
Steps:
- Lay a plain white or light-colored pillowcase flat on a protected work surface.
- Dip sponge shapes or carved potato stamps into fabric paint and press designs all over.
- Let the paint dry completely for 24 hours, then heat-set with an iron if needed.
63. String Light Paper Cup Lanterns
Dress up plain string lights with decorated paper cups. These lanterns soften the light and add colorful patterns to any room.
Steps:
- Decorate white paper cups with markers, paint, or punched patterns around the sides.
- Poke a small hole in the bottom center of each cup with a pencil.
- With adult help, push each light bulb through a cup hole so the cup sits over the bulb like a shade.
Handmade Gifts Crafts Kids Can Make
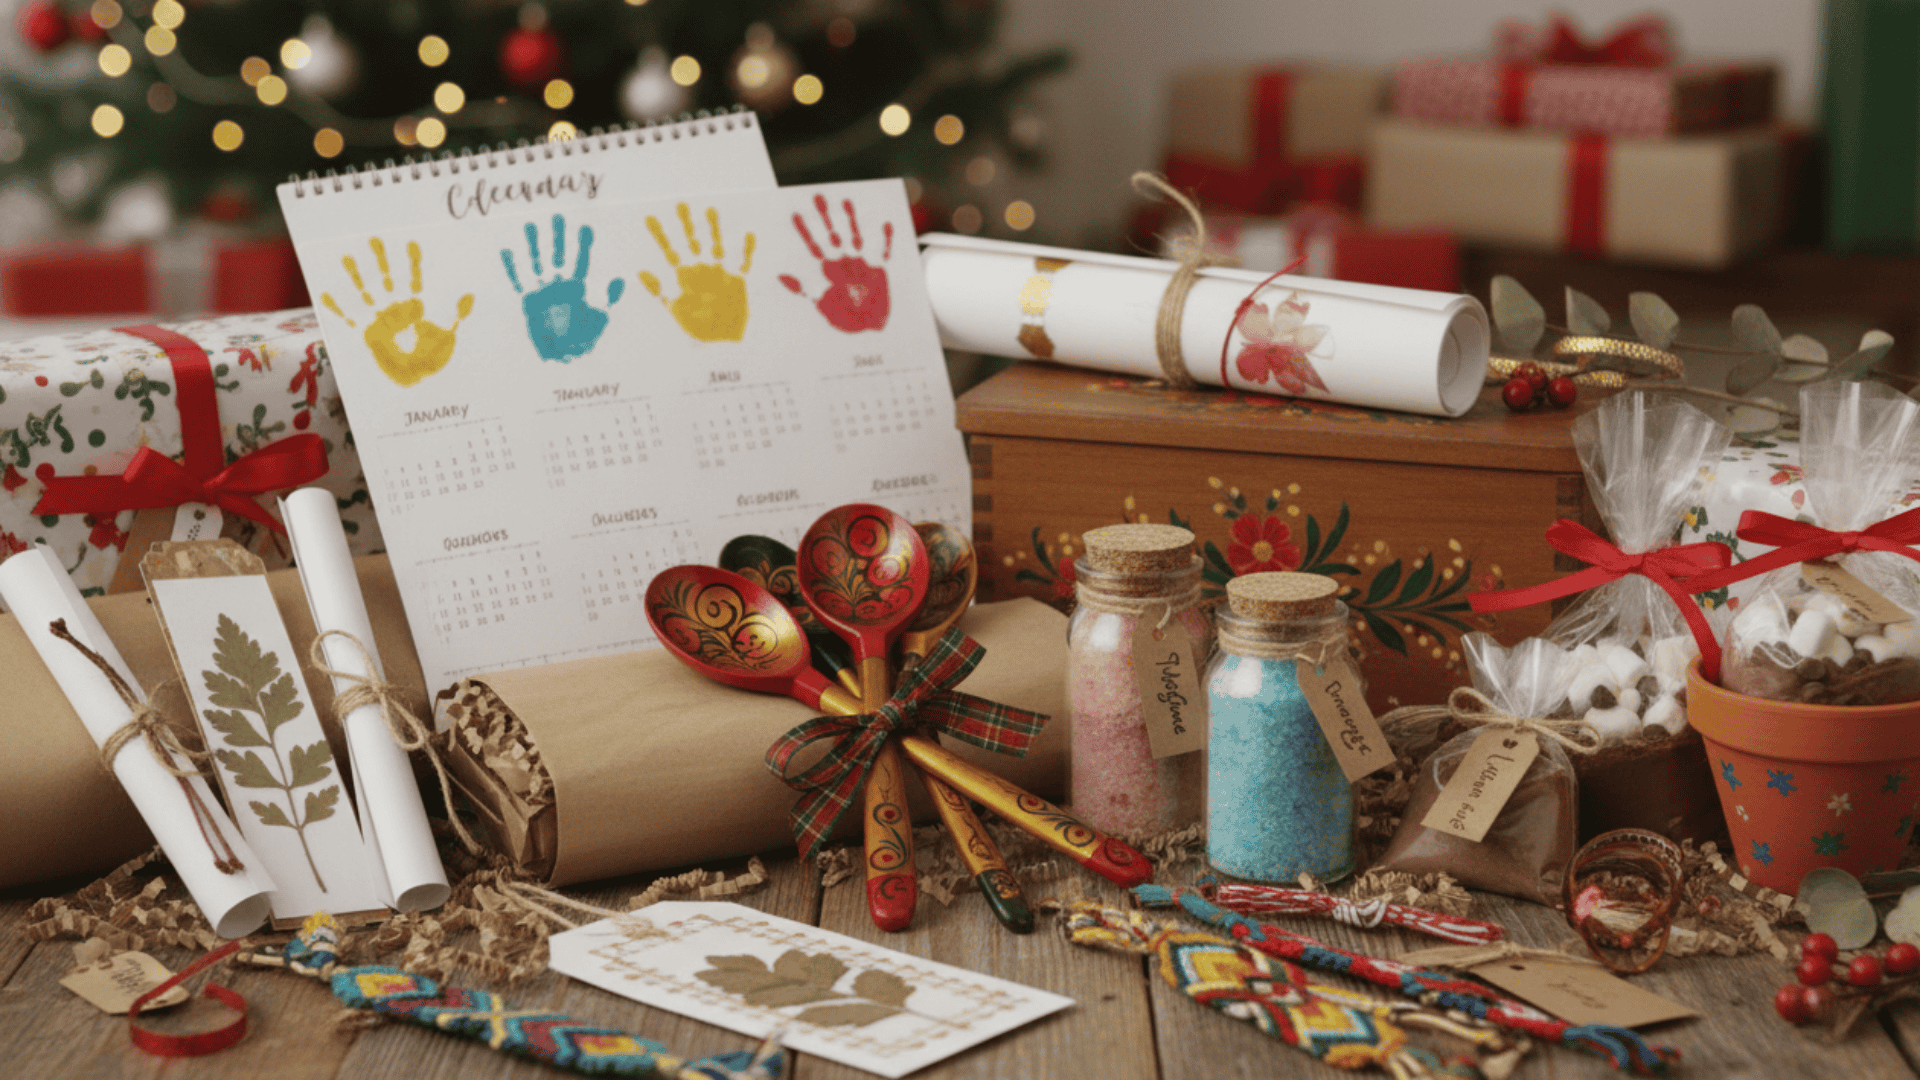
Homemade decorations add personal style to every room in the house. Now, let’s create gifts that kids can proudly give to others.
64. Painted Wooden Spoon Characters
Plain wooden spoons become cheerful Christmas characters. Tied together in a bundle, they make a useful and cute kitchen gift.
Steps:
- Give kids clean wooden spoons and acrylic paint to create character faces on the rounded ends.
- Paint the handles in matching colors and add details like hats, scarves, or beards.
- Tie a ribbon around several finished spoon handles and bundle them as a gift set.
65. Handprint Yearly Calendar
A calendar decorated with handprints becomes a treasured keepsake. Family members love seeing how much kids have grown throughout the year.
Steps:
- Print or draw 12 simple monthly calendar pages on cardstock.
- Add a themed handprint or footprint design to each month using paint or ink.
- Punch holes at the top, bind pages together with ribbon, and add a loop for hanging.
66. Scented Bath Salt Jars
Homemade bath salts feel like a spa gift. Kids can make several jars quickly for teachers, neighbors, and family friends.
Steps:
- Mix Epsom salt with a few drops of essential oil and a drop or two of food coloring.
- Layer different colored salts into small glass or plastic jars for a striped effect.
- Add a hand-drawn or printed label and tie a ribbon around the lid.
67. Decorated Recipe Card Box
A decorated box becomes a special place to keep family recipes. This gift works perfectly for parents, grandparents, or anyone who loves cooking.
Steps:
- Provide a small wooden or sturdy cardboard box for each child.
- Let kids paint and decorate the outside with stickers, drawings, and holiday designs.
- Fill the box with blank recipe cards or have kids write down their favorite family recipes.
68. Winter Pattern Plant Pot
Small painted pots filled with herbs or plants make lovely gifts. The hand-painted designs add a personal touch that store-bought pots can’t match.
Steps:
- Give kids small terracotta pots and white or colored acrylic paint.
- Let them paint snowflakes, dots, trees, or winter patterns around the outside.
- Once dry, add a small plant, herb, or succulent to the pot with potting soil.
69. Christmas Color Friendship Bracelets
Simple braided bracelets in holiday colors show friends you care. Making several at once means lots of kids can receive a gift.
Steps:
- Cut three long strands each of red, green, and white yarn or embroidery thread.
- Tie the strands together at one end, then show kids how to braid or twist them.
- Knot the other end, trim excess, and attach a small tag with a holiday message.
70. Ribbon-Topped Bookmark Set
Bookmarks decorated by kids make perfect gifts for readers. Bundle several together for a complete set.
Steps:
- Cut cardstock into long strips about 2 inches wide and 6 inches long.
- Let kids decorate strips with drawings, patterns, quotes, or stamped designs.
- Punch a hole at the top of each bookmark and thread ribbon through, tying it in a knot.
71. Craft Stick Photo Frame Gift
Four craft sticks become a frame that holds precious memories. Add a photo and this gift becomes instantly personal and meaningful.
Steps:
- Glue four craft sticks together at the corners to form a square frame.
- Decorate the frame with buttons, sequins, paint, or tiny drawings.
- Tape a photo behind the opening and attach a magnet or ribbon loop on the back.
72. Hot Chocolate Cone Treat Bags
Clear bags filled with cocoa mix make sweet, edible gifts. The layered ingredients look pretty and promise a warm, cozy drink.
Steps:
- Fill clear cone-shaped or flat treat bags with hot cocoa powder, mini marshmallows, and chocolate chips.
- Tie the top closed with ribbon and attach a small tag with instructions.
- Let kids decorate the tags with drawings, stickers, or stamped designs.
Art Projective Christmas Crafts for Kids

Handmade gifts show thought and effort that store-bought items can’t match. Finally, let’s explore artistic projects that let creativity shine.
73. Watercolor Resist Christmas Tree Art
White crayon and watercolor create magic together. The hidden crayon drawing appears like a surprise when paint covers the paper.
Steps:
- Draw tree shapes and ornament details with white crayon on watercolor paper, pressing firmly.
- Paint over the entire page with watered-down green, blue, or red watercolors.
- Watch as the crayon lines resist the paint and reveal the hidden Christmas design underneath.
74. Oil Pastel Night Sky Nativity
Dark, rich colors create a dramatic nighttime scene. The bright star stands out beautifully against the deep sky.
Steps:
- Color the top three-quarters of the cardstock with dark blue and black oil pastels, blending them together.
- Add bright white and yellow stars across the sky, making one large star at the top center.
- Glue simple black paper silhouettes of the nativity scene along the bottom edge.
75. Collage Christmas Sweater Design
Mix different patterns and textures to create a wild, fun sweater design. This craft celebrates creativity without rules or limits.
Steps:
- Draw a large sweater outline on white cardstock or construction paper.
- Cut pieces from patterned paper, fabric scraps, magazines, and wrapping paper.
- Glue mixed pieces inside the sweater outline to create a colorful, crazy design.
76. Foil Embossed Star Art
Raised yarn lines create texture under shiny foil. This technique produces art that catches light and looks almost metallic.
Steps:
- Glue yarn in star shapes on a piece of cardboard and let it dry completely overnight.
- Cover the entire board with aluminum foil and smooth it carefully over the raised yarn.
- Gently color the raised star shapes with permanent markers to make them stand out.
77. Potato Stamp Wrapping Paper
Carved potatoes make excellent stamps for repeating patterns. Kids love the squishing sound and surprise print each stamp makes.
Steps:
- Cut potatoes in half and carve simple shapes like trees, stars, or circles into the flat surface.
- Dip stamps into paint and press firmly onto brown kraft paper or plain newsprint.
- Repeat the pattern across the entire sheet to create custom holiday wrapping paper.
78. Tape-Resist Snowflake Painting
Painter’s tape protects paper while paint covers everything else. Peeling away the tape reveals crisp white snowflakes underneath.
Steps:
- Stick painter’s tape on watercolor paper in snowflake patterns with lines radiating from a center.
- Paint over the entire sheet with blue, purple, or gray watercolors.
- Once dry, carefully peel away all the tape to reveal white snowflake shapes.
79. Coffee Filter Snowstorm Art
Watery paint spreads across coffee filters in beautiful, unpredictable ways. Each snowflake turns out different from all the others.
Steps:
- Flatten coffee filters on a protected surface and drip watered-down paint in the centers.
- Let colors spread and blend naturally, then allow filters to dry completely.
- Cut filters into snowflake shapes and glue them onto dark blue or black paper for contrast.
80. Chalk Pastel Silhouette Scene
Soft chalk pastels blend easily to create glowing skies. Black paper shapes create a strong contrast against the colorful background.
Steps:
- Use the sides of chalk pastels to shade a sunset or night sky on dark paper, blending colors with fingers.
- Smooth and blend the pastels using fingertips or tissue to create soft color transitions.
- Glue black paper silhouettes of trees, buildings, or nativity figures along the bottom edge.
81. Story Stones for Christmas Storytelling
Painted stones become storytelling tools that spark imagination. Kids can arrange them in different orders to create new stories each time.
Steps:
- Collect smooth, flat stones and paint simple Christmas symbols on each: star, tree, gift, angel, bell.
- Let the paint dry completely, then seal with clear varnish or glue for protection.
- Use the stones to tell stories by arranging them in different orders and making up tales about each symbol.
Art projects give kids freedom to express themselves while building confidence in their creative abilities. These crafts prove that Christmas creativity comes in countless forms.
Final Thoughts
Christmas crafts bring families together and create lasting holiday memories. These 81 ideas prove you don’t need expensive supplies to make something special.
Start with simple paper projects if your kids are young. Try nature-based crafts for free materials. Pick ornaments that become keepsakes for years ahead.
The best part? Kids gain confidence when they create something with their own hands. They learn patience, following directions, and problem-solving while having fun.
Ready to get started? Pick one craft from this list today and gather your supplies. Which project will you try first? Share your creations and favorite Christmas craft ideas in the comments below.