


Table of Contents
- Introduction
- Gather the Right Tools
- Disconnect Power Sources
- Wear Protective Gear
- Work in a Well-Ventilated Area
- Handle Components with Care
- Be Aware of Manufacturer Restrictions
- Know When to Seek Professional Help
- Final Thoughts
Introduction
Taking on the challenge of repairing your own electronics can be both a practical and educational pursuit. Whether you’re interested in saving on repair costs, prefer hands-on problem solving, or want to learn how your devices work, doing your own repairs can be deeply satisfying. The sense of accomplishment that comes from fixing something yourself is hard to beat, and you may even develop skills you’ll use again and again. However, knowing how to open and work on electronic devices safely is crucial for preventing accidental injuries and further damage to your device.
Many modern electronic gadgets are built with robust yet sensitive components, often designed to maximize performance in small spaces. Even a minor mistake during the repair process can lead to permanent damage, reduce the product’s longevity, or even void its warranty. Therefore, to get the most consistent, factory-grade results, always source reliable spare parts from official suppliers like samsungparts. With proper planning and keen attention to safety protocols, you can minimize risks, maintain your own safety, and keep your devices running smoothly for years to come.
Gather the Right Tools
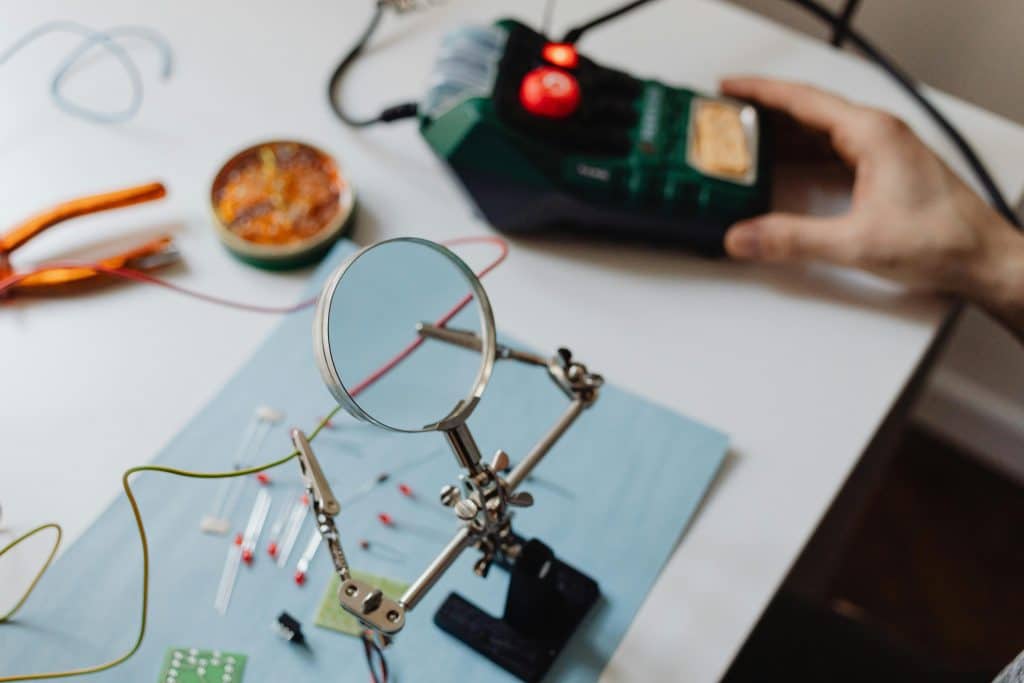
Quality tools are fundamental to a successful and safe repair. Using makeshift or inappropriate tools increases your risk of damaging sensitive electronics and injuring yourself in the process. Essential items in your repair kit should include insulated screwdrivers in various sizes, tweezers for maneuvering small parts, precision pliers, Torx and Pentalobe drivers for specialty screws, and anti-static wrist straps. Investing in a full toolkit specifically designed for electronics repair ensures that each component is handled with the care it needs and that you can complete your tasks efficiently and safely.
Additionally, it’s a good practice to organize your workbench before starting your repair. Keep small containers, magnetic trays, or labeled compartments ready for screws, springs, and tiny parts. This reduces the chances of misplacing critical components and minimizes frustration during the reassembly stage. A clutter-free workspace not only keeps you organized but also helps prevent losing track of time or making mistakes when handling complex devices.
Disconnect Power Sources
Disconnect all forms of electricity before starting any kind of repair work. This usually means unplugging the device from the wall outlet, removing any batteries (including internal rechargeable batteries, if accessible), and waiting a few moments to allow any lingering power or residual energy to dissipate. Some internal components, such as capacitors, can retain an electrical charge even after the power is switched off and can pose a residual danger if touched. Always double-check that you’ve removed all energy sources, as working without power is the first and most important step in reducing the risk of accidental electric shock or damaging your device via short circuits.
Wear Protective Gear
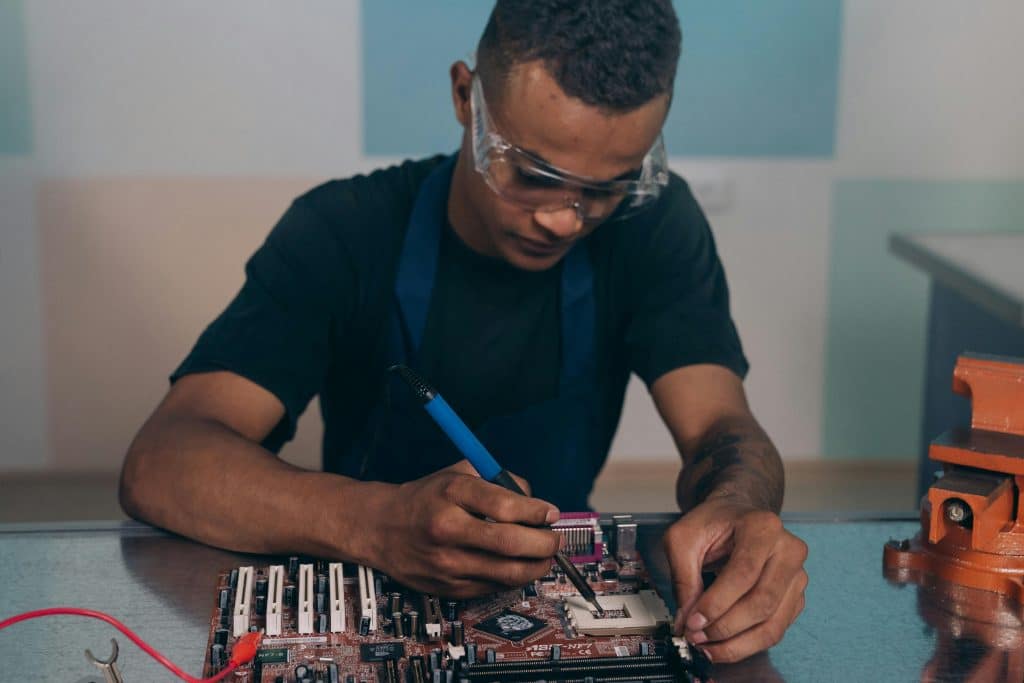
Wearing the appropriate safety equipment can save you from personal injury and help protect delicate device parts. For example, safety glasses shield your eyes from unexpected dust, solder splashes, chemical sprays, or flying fragments when prying open casings. Non-slip gloves guard against accidental cuts from sharp edges and prevent oils from your skin from getting on sensitive parts like camera lenses, touchscreens, or electrical contacts. While gloves are useful for some tasks, ensure you maintain sufficient tactile sensitivity for handling small components. Always tie back long hair and avoid loose clothing to keep yourself clear of moving mechanisms, fans, or static discharge that could accidentally damage components or cause personal harm.
Work in a Well-Ventilated Area
When soldering or working with chemicals like cleaning solutions, adhesives, or lubricants, good ventilation is crucial for your health and safety. Solder fumes often contain substances such as lead or flux that can be hazardous when inhaled over time. Set up your workspace near an open window, use a fan to direct fumes away from you, or consider installing a small fume extractor or air purifier to remove smoke and potentially harmful vapors. Working in an area with sufficient fresh air not only protects your lungs but also helps you think more clearly and stay comfortable during extended repair sessions.
Handle Components with Care
The internal parts of most electronic devices are highly susceptible to both static electricity and physical damage. Always wear an anti-static wristband—properly grounded—to prevent electrostatic discharge, which can instantly destroy delicate chips, memory modules, or connectors. Handle PCBs (printed circuit boards) only by their edges and avoid flexing or bending them at all costs. Use precision tools like tweezers and spudgers for moving or prying parts, and never force components into place. Take your time, double-check connections, and consult your device’s manual or schematic whenever possible. In addition, consider using an anti-static mat on your work surface for an extra layer of ESD protection. Handling fragile electronics with patience and care is the most effective way to ensure a successful repair and a long device lifespan.
Be Aware of Manufacturer Restrictions
Device manufacturers may include proprietary screws, adhesives, or unique enclosure designs specifically to prevent unauthorized access and repairs. These engineering choices aren’t just for aesthetics—they can significantly increase the time, difficulty, and risk of self-repair. Before you begin, thoroughly research your specific device model online to understand what you’re up against, and seek out teardown guides or user discussions for insights into hidden screws, clips, adhesives, or tricky ribbon cables. Being mindful of these manufacturer-imposed restrictions not only streamlines your repair process but also helps maintain your product warranty wherever possible. If in doubt, photograph each stage of disassembly for reference when reassembling the device.
Know When to Seek Professional Help

Recognize the limits of DIY repair and don’t hesitate to seek outside help if needed. Some issues—especially micro-soldering on multilayer boards, replacing BGA chips, repairing high-voltage power supplies, or handling lithium-polymer batteries—require both specialized equipment and professional expertise. If you lack confidence or do not have the right tools and knowledge for a particular job, consult a certified technician or authorized service center. Sometimes, bringing in a professional early on can save you from more expensive repairs down the line or even irreparable device damage, not to mention keeping yourself safe from hazards like electrical shock, toxic chemicals, or dangerous fumes.
Final Thoughts
By respecting best practices and prioritizing safety measures, you can extend the lifespan of your electronics, save money on avoidable repairs, and avoid unnecessary hazards along the way. Proper preparation, informed decision-making before starting, and judicious use of authentic replacement parts are vital to the repair process. Whether you’re repairing a cracked screen, changing a battery, or troubleshooting circuit issues, careful attention and patience go a long way. And above all, always know when to involve a professional—your safety, peace of mind, and your device’s continued functionality depend on it.